

Star Wars Squadrons update new map ships b wing tie defender is here, and it’s shaping up to be a significant upgrade! Prepare for a thrilling new map, a deep dive into the capabilities of the B-wing and TIE Defender, and a complete overhaul of the gameplay strategies. Get ready to experience a fresh perspective on aerial combat in the Star Wars universe.
This update promises a massive leap forward in Star Wars Squadrons. The new map, with its intricate layout, offers a variety of strategic opportunities. New ship designs, like the nimble B-wing and powerful TIE Defender, introduce compelling choices in aerial combat. We’ll explore how these changes might affect the overall balance and strategies within the game.
Overview of the Update

The Star Wars Squadrons update has arrived, bringing a fresh coat of paint to the game’s already impressive landscape. This update focuses heavily on enhancing gameplay through the introduction of a new map, along with new ships, promising thrilling new strategies for pilots. The improvements are significant, promising a fresh and engaging experience for returning and new players alike.
New Map: “Asteroid Field”
This new map, “Asteroid Field,” offers a dynamic and challenging environment for aerial combat. The intricate network of asteroids provides cover and concealment, encouraging a shift in tactics from the traditional open-field battles. This new terrain introduces exciting opportunities for ambush and flanking maneuvers, forcing players to adapt their strategies to the environment.
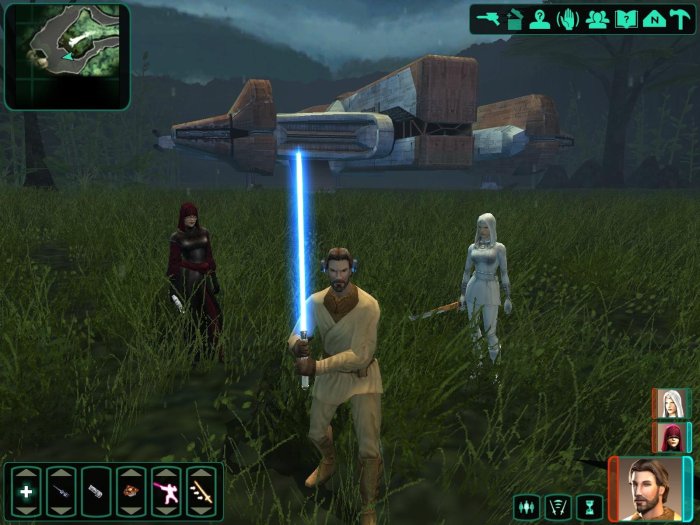
New Ships: B-Wing and TIE Defender
The update introduces two new ships: the B-Wing and the TIE Defender. These additions represent a significant upgrade in the ship roster. Each boasts unique capabilities and playstyles, potentially revolutionizing squadron composition and strategy.
B-Wing Capabilities
The B-Wing, a nimble and versatile starfighter, excels at close-quarters combat and aerial maneuvers. Its maneuverability allows for aggressive attacks and rapid evasive maneuvers. The B-Wing’s strengths lie in its powerful cannons, perfect for disrupting enemy formations and taking down weaker targets.
Loving the new Star Wars Squadrons update, especially the new map and the addition of the B-wing and TIE Defender! It’s awesome to see these new ships in action. Want to enhance your digital life further? Check out how you can integrate a ChatGPT, OpenAI Plus subscription, and other AI chatbots into your Snapchat experience with snapchat my ai chatbot chatgpt openai plus subscription.
All that, and still enjoying the fantastic new Star Wars Squadrons update features!
- High Maneuverability: The B-Wing’s agility allows for tight turns and quick bursts of speed, making it a formidable opponent in close-quarters combat. Think of it as the agile warrior of the skies.
- Powerful Cannons: Its primary armament consists of powerful cannons, making it effective at dealing significant damage to enemy ships. This is particularly useful for breaking up enemy formations and concentrating fire on specific targets. Imagine a concentrated burst of energy ripping through an enemy squadron.
- Versatile Role: The B-Wing can be utilized in various roles, from a primary attacker to a support role, depending on the needs of the squadron. This adaptability allows for a more versatile tactical approach.
TIE Defender Capabilities
The TIE Defender, a formidable heavy interceptor, is designed for defense and support. Its thick armor and powerful weaponry make it an effective shield for a squadron, while its secondary turrets allow for widespread defense.
- Defensive Prowess: The TIE Defender’s thick armor provides significant protection against enemy attacks. This robust defense makes it a formidable bulwark against enemy assaults.
- Heavy Armament: Equipped with powerful cannons and missile launchers, the TIE Defender is capable of delivering devastating blows to enemy squadrons. This combination of heavy firepower and defensive capabilities makes it a formidable opponent.
- Support Role: The TIE Defender’s secondary turrets can provide covering fire for friendly ships, allowing them to concentrate on offensive maneuvers. This creates a more balanced and powerful squadron composition.
Gameplay Mechanics and Strategies
The new map and ships introduce several potential gameplay mechanics and strategies. Pilots will need to adapt their tactics to effectively utilize the cover provided by the asteroids and exploit the unique capabilities of the new ships. This necessitates a more dynamic and versatile approach to combat.
- Exploiting Cover: The new map allows for strategic use of cover. This allows for ambushes, flanking maneuvers, and more creative engagement opportunities. The asteroids can be used to gain an advantage, allowing for sudden and devastating attacks.
- Combined Arms: Combining the strengths of the B-Wing and TIE Defender offers a more robust and adaptable squadron. The agile B-Wing can penetrate enemy lines, while the defensive TIE Defender provides cover and support.
- Formation Adjustments: Formation plays a crucial role in adapting to the new map and ships. A flexible and adaptive approach is crucial to maximizing effectiveness. Consider how the asteroids and the new ships will affect your formations.
New Map Analysis

The latest Star Wars Squadrons update introduces a fresh map, promising new tactical opportunities and challenges. This analysis delves into the intricacies of this new battlefield, examining its layout, strategic elements, and impact on the game’s balance. We’ll explore potential player strategies and how the design compares to previous maps.This new map, unlike previous ones, heavily emphasizes flanking maneuvers and the use of cover.
Understanding its layout is crucial to success, as positioning and quick reaction times become key factors in achieving victory. The map’s design, however, also presents some unique tactical disadvantages, especially for players unfamiliar with its asymmetrical characteristics.
Map Layout and Design
The new map is characterized by a sprawling, interconnected network of corridors and open areas. This design allows for both direct engagements and stealthy maneuvers. A central hub connects several distinct sections, each with unique cover and flanking possibilities. The layout is designed to encourage aggressive players to take calculated risks. Unlike some previous maps, which relied on broad frontal assaults, this map encourages tactical diversity.
Comparison to Previous Maps
Compared to previous maps, this one exhibits a more intricate and dynamic design. While earlier maps often featured linear paths, this new map introduces several chokepoints and varied terrain, offering more opportunities for both offensive and defensive strategies. The asymmetrical layout offers both advantages and disadvantages, and players must adapt their playstyles to succeed. The design offers a notable departure from the more traditional map layouts of the past, presenting a fresh and exciting approach to the game’s tactical gameplay.
Strategic Advantages and Disadvantages
The map’s strategic advantages stem from its intricate layout, which encourages players to utilize cover and flanking maneuvers. The numerous chokepoints provide excellent opportunities for defensive positioning, allowing for strategic ambushes and control over key areas. However, the same intricate layout presents some disadvantages. Navigating the complex network of corridors and open spaces can be challenging, especially for players who prefer a more direct approach.
Unfamiliarity with the map’s terrain can lead to disadvantageous positions and losses.
Potential Tactical Setups
Several tactical setups are possible. One approach involves utilizing the central hub as a staging area, deploying units to flank enemy positions from the surrounding corridors. Another approach might involve setting up ambushes in the chokepoints, using cover to conceal forces until the opportune moment for attack. Players should be flexible, adjusting their strategy depending on the enemy’s response.
Impact on Gameplay Balance
The new map has the potential to significantly impact the balance of gameplay. Its focus on flanking and cover suggests a shift towards more cautious and strategic playstyles, requiring players to adapt their tactics. The intricate corridors and open spaces will undoubtedly challenge the effectiveness of certain ship types, particularly those relying on long-range attacks. The impact on balance will become clearer as players adapt and master the nuances of the new map.
Map Section Analysis
| Section | Description | Advantages | Disadvantages |
|---|---|---|---|
| Central Hub | A central intersection connecting various sections. | Excellent for coordinating attacks, deploying forces, and controlling key routes. | High-traffic area, vulnerable to ambushes and direct attacks. |
| West Corridor | A winding corridor leading to the western flank. | Provides cover for flanking maneuvers, good for stealthy approaches. | Limited visibility, potentially leading to unexpected encounters. |
| East Wing | A section with numerous buildings and cover options. | Excellent for defensive positions, strong cover for fighters. | Difficult to traverse quickly, slow flanking maneuvers. |
| South Platform | An elevated platform offering panoramic views. | Ideal for observation, strong defensive points. | Limited cover, easy target for high-flying attackers. |
New Ship Analysis
The addition of the B-wing and TIE Defender to Star Wars Squadrons introduces exciting new options for players. These ships, with their distinct capabilities, promise diverse strategies and tactical engagements. Understanding their strengths and weaknesses is crucial for maximizing their effectiveness in combat. Each offers a unique playstyle, from the agile maneuvering of the B-wing to the powerful firepower of the TIE Defender.This analysis delves into the specifics of each ship, comparing their capabilities, weapons, and special abilities to illustrate how they can be used in various combat scenarios.
The detailed comparison table further solidifies the differences between these two pivotal ships.
B-wing Capabilities, Star wars squadrons update new map ships b wing tie defender
The B-wing, renowned for its speed and maneuverability, is a versatile fighter. Its agility allows for quick turns and evasive maneuvers, making it ideal for disrupting enemy formations and picking off targets. Its primary role is to outmaneuver opponents and provide support. The B-wing’s firepower is not overwhelming, but it is highly effective in coordinated attacks. Its special abilities, such as a powerful burst of speed or a defensive shield, further enhance its tactical utility.
TIE Defender Analysis
The TIE Defender, a formidable opponent, excels in sustained firepower and defensive capabilities. Its robust design makes it a powerful presence in combat, capable of withstanding significant damage. The TIE Defender’s primary strength lies in its concentrated fire and ability to engage in protracted battles. Its substantial firepower makes it effective in both long-range and close-quarters combat. The TIE Defender’s defensive capabilities, including shields and armor, make it resilient to enemy attacks.
Comparison of B-wing and TIE Defender
| Feature | B-wing | TIE Defender | Summary |
|---|---|---|---|
| Weaponry | Multiple smaller cannons, capable of rapid fire; potential for strong area denial. | Powerful multi-turret cannons with high damage output; more focused on sustained firepower. | B-wing excels at rapid fire and area denial, while the TIE Defender focuses on heavy damage over time. |
| Speed | Extremely high, enabling quick maneuvers and escapes. | Moderate, allowing for sustained engagement but slower than the B-wing. | The B-wing’s superior speed grants it a significant tactical advantage in evading attacks and initiating maneuvers. |
| Maneuverability | Exceptional, allowing for precise maneuvers and evasive actions. | Good, but not as agile as the B-wing; well-suited for maintaining position. | The B-wing’s superior agility makes it difficult to target effectively, while the TIE Defender is more predictable in its movement. |
| Defensive Capabilities | Relatively low; relies more on speed and agility for protection. | High, boasting shields and armor to withstand significant damage. | The TIE Defender’s robust defense makes it a strong choice for sustained engagements, while the B-wing’s defensive strategy prioritizes evasion. |
Gameplay Implications
The Star Wars Squadrons update, introducing the B-wing and Tie Defender, promises a significant shift in the game’s tactical landscape. Players can anticipate a dynamic evolution in how they approach aerial combat, necessitating adjustments to established strategies and potentially altering player engagement. The addition of these new ships introduces diverse roles and possibilities for team composition, demanding innovative strategies to maximize their potential.The update’s impact extends beyond individual ship performance; the introduction of a new map will affect team dynamics and strategies.
The interplay between the new ships and the existing fleet will determine the most effective team compositions and tactics, ultimately shaping the competitive environment.
Potential Adjustments to Existing Strategies
The B-wing’s agility and versatility, coupled with the Tie Defender’s defensive capabilities, introduce counterpoints to existing strategies. Players reliant on pure offensive tactics may need to adapt by incorporating support roles and defensive maneuvers. The B-wing’s superior maneuverability in tighter spaces might favor aggressive flanking maneuvers, while the Tie Defender’s shield and firepower could become crucial for securing objectives and defending against incoming assaults.
New Ship Analysis in Team-Based Scenarios
The effectiveness of these new ships depends heavily on how they are integrated into team-based scenarios. The B-wing’s speed and agility make it ideal for scouting and flanking maneuvers, disrupting enemy formations and providing crucial information for the team. Conversely, the Tie Defender, with its defensive capabilities, can anchor a team, absorbing enemy fire and providing cover for vulnerable assets.
Just saw the Star Wars Squadrons update dropped some awesome new maps, ships, and the B-wing and TIE Defender. It’s a total blast to pilot those around the new battlefields. Speaking of awesome things to watch, have you seen Frozen 2 on Disney Plus? It’s a great family movie for a relaxing evening. If you’re looking for more info on Frozen 2 Disney Plus streaming, check out this resource frozen 2 disney plus streaming.
Regardless, I’m stoked to keep flying those ships in Star Wars Squadrons now that the update is live!
Understanding how to leverage these strengths is key to achieving victory.
Team Composition Strategies and Synergies
Effective team compositions will need to balance offensive and defensive roles. Different team compositions will be effective in different scenarios. A team focused on offense might consist of a squadron of B-wings to quickly eliminate enemies, supported by Tie Defenders for protection. A balanced team might employ a mix of fighters, bombers, and support ships, utilizing the B-wing’s scouting ability to support strategic decisions.
Star Wars Squadrons just dropped a massive update with a new map and some awesome new ships, like the B-wing and TIE Defender. It’s super exciting to see the new content, and I’m already diving in. Speaking of exciting updates, if you’re into Genshin Impact, you absolutely need to check out genshin impact update 32 for the latest additions and changes.
All that new content makes me even more pumped for the next round of Star Wars Squadrons action!
| Team Composition | Ship Roles | Strategies | Synergies |
|---|---|---|---|
| Offensive Squad | 3 B-wings, 1 Tie Defender | Aggressive flanking, rapid objective capture. | B-wings provide fast assaults, Tie Defender absorbs damage, allowing rapid re-deployment and maintaining offensive pressure. |
| Balanced Squad | 2 B-wings, 2 Tie Defenders, 2 Starfighters | Balanced attack and defense, strategic reconnaissance. | B-wings scout and flank, Tie Defenders provide defensive support, Starfighters offer a diverse attack, creating a dynamic offense and defense combination. |
| Defensive Squad | 4 Tie Defenders, 2 Starfighters | Strong defensive posture, protecting objectives. | Tie Defenders form a formidable shield, Starfighters offer support and counter-attack. |
Visual Representation
Star Wars Squadrons’ newest update brings a fresh wave of visual excitement, transforming the battlefield with new maps and ships. This section delves into the detailed aesthetics, from the vibrant colors of the new map to the intricate designs of the updated vessels. The visual enhancements aim to immerse players in a more realistic and engaging experience, showcasing the power and beauty of the Star Wars universe.
New Map Visual Style
The new map, codenamed “Rebellion’s Crucible,” boasts a vibrant palette of colors and textures. Dominant hues are deep blues and grays, reminiscent of a shattered moon or asteroid field, juxtaposed with fiery oranges and yellows representing active volcanic vents and laser fire. This color scheme creates a sense of intense conflict and dynamic action. The map’s lighting is strategically employed, casting dramatic shadows and highlighting key features, enhancing the sense of depth and scale.
The lighting effects are designed to simulate the interplay of natural and artificial light sources, mimicking the interplay of sunlight and laser fire on the moon’s surface.
The environment features intricate details, from towering, jagged rock formations to the shimmering debris fields that pepper the landscape. Smoke and dust effects are prominent, realistically depicting the aftermath of intense battles.
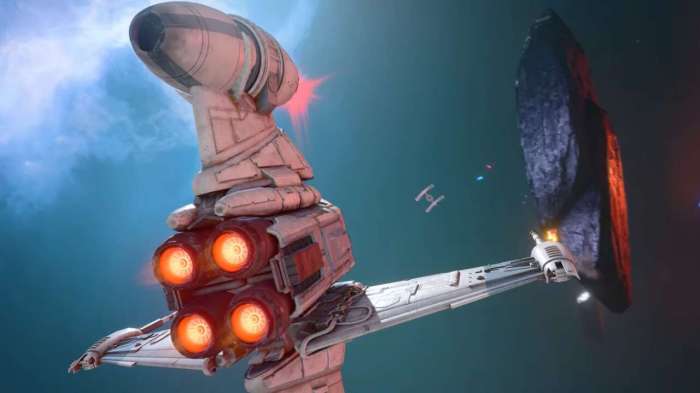
New Ship Visuals
The updated ships, the B-wing and Tie Defender, exhibit significant visual improvements. The B-wing features a more streamlined design, with enhanced details in its cockpit and wings. Its overall aesthetic emphasizes speed and agility, with subtle changes in color gradients and texture patterns.
- The B-wing’s cockpit now displays a more detailed instrument panel, with glowing indicators and dials that enhance its futuristic aesthetic. The wings are now sculpted with more pronounced curvature, emphasizing the ship’s aerodynamics and ability to maneuver through space with precision.
- The Tie Defender showcases a powerful, imposing presence. Its color scheme incorporates darker shades of gray and black, with metallic accents highlighting its armored exterior. The unique design of the TIE Defender, with its distinctive gun turrets and reinforced hull, visually communicates its role as a formidable support vessel.

Visual Representation in Different Scenarios
The new ships and map are designed to seamlessly integrate into various gameplay scenarios.
- Dogfights: The B-wing’s sleek lines and agility are visually emphasized during aerial combat. Its sharp turns and evasive maneuvers are clearly depicted, highlighting its superior maneuverability compared to the Tie Defender. The TIE Defender, though less agile, is visually powerful in its close-quarters dogfights, showcasing its heavily armored hull and devastating firepower. The background debris field provides an immersive environment for the action, creating a dynamic visual experience.
- Ground Assaults: The map’s visual style seamlessly transitions to ground combat scenarios. The uneven terrain and volcanic landscapes provide varied cover for players. The intensity of the battles is reflected in the lighting and smoke effects, emphasizing the dramatic action unfolding on the ground.
- High-Altitude Encounters: High-altitude encounters will showcase the map’s vastness. The ships will appear smaller against the backdrop of the moon’s surface, emphasizing the sheer scale of the environment and the strategic importance of high-ground positions.
Map Visuals – Player Experience
The new map, “Rebellion’s Crucible,” offers a visually rich and varied experience for players.
The design of the map emphasizes strategic gameplay, with varied terrain offering ample opportunities for players to position themselves effectively.
- Volcanic Vents: These provide cover and vantage points, allowing players to strategically deploy their ships and fire upon enemies.
- Debris Fields: These fields create strategic opportunities and concealments, enabling tactical maneuvers and surprise attacks.
- Cratered Landscapes: The craters offer opportunities for players to take cover and launch surprise attacks from unexpected positions. Players must consider the terrain’s influence on ship movement and positioning.
Ending Remarks: Star Wars Squadrons Update New Map Ships B Wing Tie Defender
In conclusion, the Star Wars Squadrons update brings a fresh perspective to the game with a new map, exciting ships, and a potential shift in gameplay strategies. The B-wing and TIE Defender offer unique tactical advantages, while the new map introduces exciting new opportunities for players to demonstrate their skills. This update is poised to significantly enhance the game’s depth and replayability.