

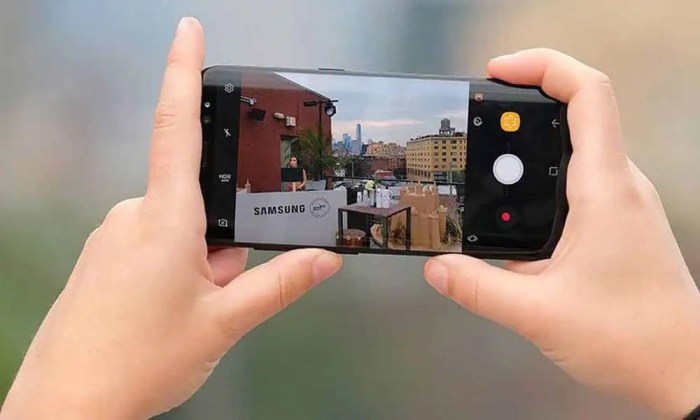
Samsung Galaxy S9 camera tips and tricks: Unleash the potential of your S9’s camera with these expert-level guides. From mastering basic settings to capturing stunning photos and videos, we’ll explore every facet of this powerful smartphone camera. Discover hidden features and innovative techniques to elevate your photography and videography.
This comprehensive guide dives deep into the Samsung Galaxy S9’s camera system, providing practical advice and insightful tips for optimal image quality and creative expression. We’ll cover everything from basic adjustments to advanced techniques, including expert advice on capturing stunning photos and videos in various lighting conditions. Whether you’re a seasoned photographer or just starting out, this resource is designed to empower you to get the most out of your Samsung Galaxy S9’s camera.
Introduction to the Samsung Galaxy S9 Camera
The Samsung Galaxy S9, released in 2018, marked a significant step forward in mobile photography, offering a sophisticated camera system that balanced performance with user-friendliness. Its key features quickly became a topic of discussion among tech enthusiasts and photography enthusiasts alike, raising expectations for future mobile camera technology.This detailed look at the S9 camera delves into its strengths, weaknesses, features, and performance, providing a comprehensive understanding of its capabilities and limitations compared to its predecessors.
We’ll examine its various modes, image quality, and evolution within the context of mobile photography.
Camera Features Overview
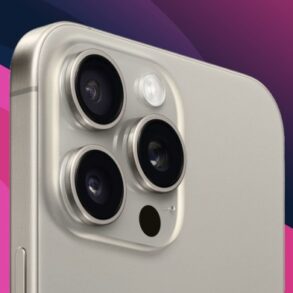
The Samsung Galaxy S9 boasted a dual-lens rear camera system. This setup included a primary wide-angle lens and a secondary telephoto lens. While the telephoto lens offered limited optical zoom, it significantly improved the versatility of the camera compared to single-lens systems.
Key Camera Modes
The Galaxy S9 offered a range of camera modes to cater to different user needs and photographic styles.
- Auto Mode: This mode automatically adjusts various camera settings to provide optimal image quality in most situations. It’s ideal for casual photography and quick snapshots, simplifying the process for novice users.
- Pro Mode: This mode grants users greater control over camera settings, including ISO, aperture, shutter speed, and white balance. This allows experienced photographers to fine-tune images for specific creative effects and artistic expression. It provides a more manual approach to image capture, enabling a level of customization not always available on similar mobile cameras.
- Video Mode: The S9’s video capabilities were a significant improvement over previous models. It offered high-resolution video recording options, including features like stabilization and high frame rates. The improved stabilization minimized blur during handheld recording, leading to smoother and clearer video footage.
Image Quality and Performance
The Samsung Galaxy S9 camera demonstrated impressive image quality, particularly in well-lit environments. Its ability to capture sharp and detailed images in daylight conditions was noteworthy. However, in low-light scenarios, image quality could suffer from noise and a slight loss of detail.
Lighting Conditions
- Daylight: Excellent color accuracy and detail capture were consistent in daylight. Images were sharp and vibrant.
- Low Light: The camera’s performance in low-light conditions was adequate but not exceptional. Images often exhibited noticeable graininess and a reduction in detail.
- Indoor Lighting: The camera performed well in indoor settings with sufficient lighting. However, in poorly lit indoor environments, image quality suffered.
Camera Evolution Compared to Previous Models
The S9 camera represented a significant evolution from previous models, particularly in its improved low-light performance and video recording capabilities. The addition of a telephoto lens broadened the S9’s capabilities, providing a level of zoom and versatility that wasn’t readily available on prior Samsung models.
Key Features Summary
| Feature | Description |
|---|---|
| Rear Camera | Dual-lens system with wide-angle and telephoto lenses |
| Modes | Auto, Pro, Video |
| Image Quality | Sharp and detailed in well-lit conditions; some noise in low light |
| Video Recording | High-resolution video with stabilization |
| Evolution | Improved low-light performance and video features compared to previous models |
Mastering Basic Camera Settings

Unlocking the full potential of your Samsung Galaxy S9 camera goes beyond just pointing and shooting. Understanding and adjusting basic camera settings empowers you to capture stunning images in various lighting conditions and situations. This crucial step allows you to fine-tune the image quality, achieving the desired look and feel.
Importance of Basic Camera Settings
Basic camera settings, including ISO, shutter speed, and aperture, are fundamental to achieving optimal image quality. These settings, when understood and controlled, allow you to tailor the camera’s response to the specific lighting conditions, resulting in better exposure and detail. Mastering these controls will dramatically improve your photos, from crisp landscapes to well-exposed portraits.
Adjusting ISO
ISO, or International Organization for Standardization, measures the camera sensor’s sensitivity to light. A lower ISO (e.g., 100) is ideal in bright conditions, producing cleaner images with fewer grain artifacts. Higher ISO values (e.g., 800, 1600, or higher) are necessary in low-light situations but increase the risk of noise (graininess) in the image.
Snapping killer shots with your Samsung Galaxy S9? Pro-tip: Mastering the camera settings is key. Speaking of captivating imagery, remembering the great Angela Lansbury and wanting to revisit her iconic role in Murder, She Wrote? You can find out how to stream it for free at this resource. Knowing these streaming options opens up more time for exploring those advanced Galaxy S9 camera tricks, like low-light photography or portrait mode.
Adjusting Shutter Speed, Samsung galaxy s9 camera tips and tricks
Shutter speed dictates how long the camera’s sensor is exposed to light. A faster shutter speed (e.g., 1/1000s) freezes motion, capturing sharp images of moving subjects. A slower shutter speed (e.g., 1/30s or slower) allows more light to reach the sensor, useful for low-light situations but can result in blurry images if the subject is moving.
Adjusting Aperture
Aperture, often represented by an f-stop number (e.g., f/1.7, f/5.6), controls the amount of light entering the camera lens. A wider aperture (smaller f-stop number) allows more light and creates a shallow depth of field, blurring the background and focusing attention on the subject. A narrower aperture (larger f-stop number) allows less light and produces a greater depth of field, keeping both foreground and background in focus.
Step-by-Step Guide for Optimizing Basic Settings
1. Assess the Lighting Analyze the lighting conditions. Bright sunlight necessitates lower ISO and faster shutter speeds. Low-light situations require higher ISO and potentially slower shutter speeds.
2. Choose the Right ISO Select the lowest ISO possible for optimal image quality. Only increase ISO if necessary to compensate for low light.
3. Adjust Shutter Speed Select a shutter speed appropriate for the subject’s motion. Fast shutter speeds are essential for freezing action, while slower shutter speeds are better for capturing motion blur.
4. Adjust Aperture Select an aperture that balances depth of field with the desired effect. Wider apertures isolate the subject, while narrower apertures create a more focused image across the scene.
5. Review and Refine Examine the image on the screen and adjust settings as needed. Experiment to discover the best settings for various conditions.
Impact on Different Types of Photos
The choice of settings significantly affects different photo types. For example, a landscape photo benefits from a narrower aperture to maintain sharpness across the entire scene. A fast shutter speed and lower ISO are ideal for sports photography. Portrait photography often utilizes a wider aperture to blur the background.
Table of Common Settings and Their Effects
| Setting | Value | Effect |
|---|---|---|
| ISO | 100 | Low light sensitivity, clean images |
| ISO | 800 | Better low light performance, possible noise |
| Shutter Speed | 1/1000s | Freezes motion, sharp images |
| Shutter Speed | 1/30s | Allows more light, may result in motion blur |
| Aperture | f/1.7 | Shallow depth of field, blurred background |
| Aperture | f/16 | Greater depth of field, everything in focus |
Enhancing Photos with Advanced Modes

The Samsung Galaxy S9 offers a plethora of advanced camera modes beyond the basic settings, unlocking creative potential and allowing for more nuanced control over image capture. These modes empower users to fine-tune elements like lighting, focus, and composition, producing high-quality results in various situations. Learning how to leverage these advanced features can significantly elevate your photography.Advanced camera modes on the Samsung Galaxy S9, such as Pro, AR, and Night, provide a level of customization and control that basic modes lack.
Understanding these modes’ capabilities and how to effectively utilize them can transform your smartphone photography.
Pro Mode
Pro mode provides full manual control over key camera settings. This gives you the power to adjust ISO, shutter speed, and aperture, allowing for precise control over the exposure and depth of field. Understanding these parameters is crucial for achieving the desired image quality. For example, a faster shutter speed can freeze motion, while a wider aperture creates a shallow depth of field, blurring the background.
AR Mode
AR mode leverages augmented reality to overlay digital elements onto your real-world photos. This mode allows for creative and engaging photo enhancements. For example, users can virtually try on different hairstyles, makeup looks, or even add fun filters and effects to their pictures.
Night Mode
Night mode is designed for low-light photography, effectively reducing noise and increasing clarity in dimly lit environments. This mode’s success hinges on the camera’s ability to capture multiple frames and intelligently combine them, reducing the noise often associated with low-light shots.
Adjusting Settings in Advanced Modes
Advanced modes often provide a dedicated interface for adjusting white balance, focus, and other settings. For example, in Pro mode, you’ll typically find controls to fine-tune the white balance to compensate for different light sources, ensuring accurate color representation in your photos. Similarly, adjusting focus can be critical, allowing you to select specific points of interest within the scene.
Comparing Advanced and Basic Modes
Basic modes offer a user-friendly experience for quick snapshots. Advanced modes, however, provide a deeper level of control for photographers seeking more nuanced results. In situations demanding precise exposure or a specific artistic effect, advanced modes shine. For instance, a landscape photographer might use Pro mode to adjust the aperture for a wider depth of field.
Scenarios Where Advanced Modes Are Beneficial
Advanced modes prove beneficial in diverse scenarios. Pro mode is excellent for controlling lighting and depth of field, allowing you to capture dramatic portraits or stunning landscapes. AR mode is great for fun and creative photos, allowing you to try on different items or add special effects. Night mode shines in low-light environments, capturing clear and detailed images where basic modes struggle.
Snapping killer shots with your Samsung Galaxy S9 is easier than you think! Mastering the camera’s settings is key, but exploring accessories can also elevate your game. For example, if you’re looking to take your vlogging to the next level, check out the Sony GPVPT3 multi function shooting grip camera alpha series vlogging here. Ultimately, though, getting the most out of your S9 camera still comes down to understanding its various modes and shooting techniques.
Features Summary of Advanced Modes
| Mode | Description | Use Cases |
|---|---|---|
| Pro | Full manual control over camera settings (ISO, shutter speed, aperture) | Precise control over exposure, depth of field, and motion blur |
| AR | Augmented reality features to overlay digital elements | Creative photos, virtual try-ons, special effects |
| Night | Low-light photography mode reducing noise | Capturing clear images in low-light conditions |
Tips and Tricks for Capturing Stunning Photos
Unlocking the full potential of your Samsung Galaxy S9 camera goes beyond simply pointing and shooting. Mastering a few key techniques can transform your snapshots into truly stunning photographic pieces. This section dives into practical tips and tricks for various shooting scenarios, from low-light situations to creative portraiture. Learn how to improve composition, harness advanced camera modes, and even achieve specific effects like bokeh.This exploration of camera techniques will empower you to capture breathtaking photos in any situation, turning your everyday moments into lasting memories.
Capturing High-Quality Photos in Various Situations
Knowing how to adjust your camera settings for different environments is crucial for achieving optimal results. Understanding the interplay of light, subject, and background is key to capturing stunning photos. Different situations require different approaches.
- Low Light Photography: Maximize the S9’s capabilities by utilizing the camera’s low-light mode and ensuring a stable platform to minimize blur. Employing a tripod or a stable surface is vital. Increase ISO carefully to avoid noise, and use a wider aperture (smaller f-number) to let in more light. Consider using a flash judiciously to avoid harsh reflections.
- Landscapes: Frame your shot to highlight the scene’s vastness and depth. Consider including foreground elements to draw the viewer’s eye into the image. Use a narrow aperture (higher f-number) to maintain depth of field and ensure details in both the foreground and background are sharp. Shoot in RAW format for greater flexibility in post-processing.
- Portraits: Use the portrait mode for a beautiful background blur (bokeh). Position your subject against a visually appealing background to complement their features. Experiment with different lighting conditions to achieve desired effects. Adjust the focus point to ensure the subject remains sharp, and utilize the S9’s Portrait mode for a flattering result.
Improving Composition and Framing
Effective composition significantly enhances the visual appeal of a photograph. Rule of thirds, leading lines, and symmetry are powerful tools to arrange elements within the frame. This section provides key techniques to enhance your shots.
- Rule of Thirds: Imagine your frame divided into nine equal parts by two horizontal and two vertical lines. Place key elements along these lines or at their intersections for a more balanced and engaging composition.
- Leading Lines: Use lines in the scene to draw the viewer’s eye towards the subject. This can create a sense of depth and direction in the image.
- Symmetry and Patterns: Look for symmetrical or repeating patterns in your surroundings. Capturing these elements can create visually appealing and intriguing images.
Creative Photography Approaches
Exploring different photographic styles can elevate your photos beyond the ordinary. Experiment with various perspectives, angles, and subject choices to capture unique and artistic images.
- High-Angle Shots: Capture a scene from a higher vantage point for a different perspective. This can highlight the scale of a landscape or create an unusual feel for a portrait.
- Low-Angle Shots: Capture a scene from a lower perspective to emphasize height and power. A low angle shot of a towering building can evoke a sense of grandeur.
- Abstract Photography: Focus on shapes, colors, and textures to create an abstract image that captures a feeling or emotion.
Achieving Specific Effects
The S9 offers several creative effects to enhance your photos. Understanding these effects and how to use them is essential for creating compelling images.
Snapping killer shots with your Samsung Galaxy S9? Pro-level camera tips and tricks are out there! While exploring these, it’s worth considering the recent news about Meta potentially abandoning a tool that researchers used to track misinformation online, as reported in this article meta plans to drop tool researchers use to track misinformation online report says.
Regardless of the social media giant’s decisions, mastering your S9’s camera remains a great way to document the world around you. Learning the best settings and angles will help you capture those perfect memories.
- Bokeh: Utilize the portrait mode or adjust aperture settings for a beautiful background blur. The effect emphasizes the subject while softly blurring the background.
- Motion Blur: Use a slow shutter speed to capture motion, resulting in a blurry effect for moving subjects. This is great for capturing action and conveying movement in your photographs.
Post-Processing Images
Post-processing can significantly improve the quality and impact of your images. Utilizing editing apps and filters allows for precise adjustments.
- Editing Apps: Explore various mobile editing apps like Snapseed, Lightroom, or others to fine-tune your images. These apps provide powerful tools for adjusting exposure, contrast, and other aspects.
- Filters: Utilize filters to add a unique artistic touch to your photos. Experiment with different filters to find those that best enhance your image.
Video Recording Techniques
Capturing smooth, high-quality video is a crucial aspect of mobile photography, and the Samsung Galaxy S9 excels in this area. This section dives deep into the various video modes available, providing tips for achieving stable footage and optimal settings for diverse shooting scenarios. Learn how to harness the S9’s video capabilities to create stunning visual narratives.
Video Modes and Capabilities
The Samsung Galaxy S9 offers a range of video modes, each with its own strengths. Understanding these modes is key to selecting the appropriate setting for your needs. Different modes cater to different shooting styles and desired outcomes, allowing you to capture everything from quick action shots to detailed, cinematic recordings.
- Standard Video Mode: This mode provides a versatile option for everyday video recording. It offers a balance between quality and ease of use, suitable for capturing everyday moments or interviews. The S9’s image stabilization ensures relatively smooth footage, even when shooting handheld.
- Super Steady Video Mode: This mode is designed for enhanced stabilization, crucial for shooting shaky or dynamic scenes. It uses advanced algorithms to compensate for camera movement, creating a steadier, more professional-looking video, especially beneficial when recording on the move or during fast-paced events. This mode is perfect for capturing action sports, or when steadiness is a priority.
- Slow-Motion Video Mode: This mode allows for capturing moments at a slower speed than real-time. The S9 often allows for various slow-motion speeds, which can be utilized to highlight specific details or create unique visual effects. This is excellent for capturing quick actions or moments that require a slower, more deliberate view.
- Hyperlapse Video Mode: This mode creates time-lapse videos, compressing a long period of time into a shorter video. The S9 automatically adjusts the footage and applies creative effects, resulting in visually striking videos. This is perfect for showing the passage of time or capturing events that unfold over extended periods.
Tips for Recording Smooth and Stable Videos
Achieving smooth and stable video recordings is essential for a professional-looking final product. Consider these tips to enhance your video quality:
- Use a Tripod or Stabilizer: A tripod or handheld stabilizer dramatically reduces camera shake, leading to significantly smoother video footage. This is especially important for long takes or when shooting in challenging conditions. The use of a tripod allows for capturing detailed scenes without any shaking.
- Maintain a Steady Grip: Even with image stabilization, a steady hand is crucial for minimizing unwanted movement. Keep your elbows close to your body and hold the phone firmly. A steady grip minimizes shaking, enhancing video quality, especially during handheld recordings.
- Avoid Sudden Movements: Sudden shifts in your position can cause the video to appear jerky. Try to move smoothly and gradually, maintaining a consistent posture throughout the recording.
Adjusting Video Settings for Optimal Results
Fine-tuning video settings can significantly impact the final product’s quality. Experiment with these adjustments to optimize your recordings:
- Resolution: Higher resolutions result in sharper video, but also require more storage space. Choose the resolution that balances quality with storage capacity.
- Frame Rate: A higher frame rate allows for smoother playback, especially when recording fast-moving subjects. The optimal frame rate depends on the subject and desired effect.
- Video Stabilization: The S9 offers various video stabilization modes, including Super Steady. Experiment with these modes to find the one that best suits your recording style.
Capturing High-Quality Video in Different Scenarios
Adapting your video recording technique to the environment is crucial. Different situations require different approaches:
- Outdoor Scenes: Use the Super Steady mode to counteract movement. Adjust the exposure to compensate for bright sunlight. Consider a tripod for stability.
- Indoor Scenes: Ensure adequate lighting for clear recordings. Avoid using flash unless necessary, as it can create harsh highlights. Maintain a steady hand to capture details.
Comparison of Video Modes
| Video Mode | Resolution | Frame Rate | Stabilization | Description |
|---|---|---|---|---|
| Standard | 1920 x 1080 | 30 fps | Electronic Image Stabilization | Versatile everyday mode |
| Super Steady | 1920 x 1080 | 30 fps | Advanced Image Stabilization | Enhanced stability for dynamic scenes |
| Slow Motion | 1920 x 1080 | 120 fps or 240 fps | Electronic Image Stabilization | Captures moments in slow motion |
| Hyperlapse | 1920 x 1080 | Variable | Image Stabilization | Creates time-lapse videos |
Troubleshooting Common Camera Issues
The Samsung Galaxy S9 boasts a powerful camera, but like any technology, it can sometimes encounter problems. Understanding common issues and their solutions is crucial for maximizing your camera’s potential and ensuring consistently stunning photos and videos. This section delves into practical troubleshooting steps to resolve various camera malfunctions, enabling you to quickly diagnose and fix problems with focus, exposure, or other functionalities.Identifying the root cause of a camera problem often leads to a faster and more effective solution.
This section offers step-by-step guides to resolve common issues, empowering you to maintain optimal camera performance and prevent future problems.
Identifying Focus Issues
Focus problems are common camera issues, often stemming from insufficient light, poor subject positioning, or sensor malfunctions. Accurately identifying the cause is essential for applying the right troubleshooting steps.
- Insufficient Light: Low-light conditions can lead to blurry images due to the camera’s struggle to acquire enough light for precise focus. Ensure adequate lighting when shooting in low-light environments. Using a tripod or flash can greatly improve the chances of sharp focus in these scenarios.
- Poor Subject Positioning: The subject’s distance and proximity to the camera can significantly affect the camera’s ability to focus. If the subject is too far or too close to the camera, the camera may struggle to maintain sharp focus.
- Sensor Malfunction: In rare cases, the camera sensor itself may malfunction, causing focus problems. This is less common and may require a service visit to a Samsung authorized repair center.
Resolving Exposure Problems
Exposure problems often result in photos that are either too dark (underexposed) or too bright (overexposed). Understanding the causes behind exposure errors is critical for effectively addressing these issues.
- Underexposure: Underexposed photos are characterized by a lack of brightness, resulting in dark or shadowy images. This can be caused by insufficient light or incorrect settings on the camera. Adjusting the exposure compensation or using a flash can rectify this issue.
- Overexposure: Overexposed photos are excessively bright, often appearing washed out. This can occur in very bright lighting conditions or when the camera’s exposure settings are too high. Adjusting the exposure compensation or reducing the brightness can resolve this problem.
- Incorrect White Balance: Incorrect white balance settings can lead to inaccurate color representation in images, often resulting in a yellowish or bluish cast. Selecting the appropriate white balance setting according to the ambient lighting conditions can correct this issue.
Troubleshooting Other Camera Functions
This section addresses troubleshooting steps for various camera functions that might encounter issues.
- Camera App Crashes: If the camera app unexpectedly crashes, try restarting the device or clearing the app’s cache and data. If the issue persists, update the app to the latest version.
- Image Stabilization Issues: Image stabilization is a feature to reduce blurring caused by camera shake. If image stabilization is ineffective, check for obstructions in the lens area, or consider using a tripod.
- Poor Image Quality: If the image quality is not up to par, check for any obstructions in the lens, verify that the lens is clean, or consider using different camera modes to enhance the quality.
Preventive Measures
Preventing camera issues is often easier than fixing them. These proactive steps can minimize problems.
- Keeping the Lens Clean: Regularly cleaning the camera lens with a soft cloth can prevent dust or smudges from affecting image quality and focus.
- Storing the Device Properly: Protect the device from extreme temperatures, moisture, and physical shocks.
- Updating Software Regularly: Ensure the camera app and operating system are up-to-date for optimal performance and bug fixes.
Important Note: If a problem persists after trying these solutions, consult the Samsung Galaxy S9 user manual or contact Samsung support for further assistance.
FAQ
Q: My camera keeps focusing on the wrong subject. What should I do?
A: This can be caused by insufficient light, poor subject positioning, or even a sensor malfunction. Try adjusting the lighting, repositioning the subject, or, if the issue persists, contact Samsung support.
Q: My photos are too dark. How do I fix this?
A: Underexposure often occurs due to insufficient light or incorrect settings. Try adjusting the exposure compensation or using a flash to correct the issue.
Creative Photography with the Galaxy S9: Samsung Galaxy S9 Camera Tips And Tricks
Unlocking the artistic potential of your Samsung Galaxy S9 camera goes beyond capturing simple snapshots. This exploration delves into innovative techniques for creative photography, emphasizing the role of lighting, composition, and post-processing to transform ordinary moments into extraordinary images. Experiment with different styles and discover how to harness the S9’s capabilities to express your unique vision.The Galaxy S9, while offering excellent everyday photography, allows for a significant leap in creativity.
Mastering its capabilities unlocks a world of artistic possibilities, from striking black and white conversions to vibrant HDR enhancements. Understanding the interplay of lighting and composition, along with effective editing techniques, empowers you to capture truly artistic images.
Exploring Black and White Photography
Converting color images to black and white can dramatically alter the mood and focus of a photograph. The S9’s camera allows for nuanced black and white conversions, enabling photographers to highlight textures and contrasts while stripping away distracting color elements. Experiment with different tonal ranges and explore how the absence of color can emphasize form and shape.
Utilizing HDR Mode for Dynamic Range
HDR (High Dynamic Range) mode is a powerful tool for capturing scenes with significant variations in light and shadow. The S9’s HDR implementation excels at preserving detail in both highlights and shadows, resulting in images with a wider range of tones and a more realistic representation of the scene. Learn to recognize scenes where HDR will significantly enhance the visual appeal.
Mastering Composition Techniques
Composition is the art of arranging elements within a frame to create a visually appealing and meaningful image. Techniques such as the rule of thirds, leading lines, and symmetry can be used to guide the viewer’s eye and create a more impactful photograph. Understanding these principles allows you to frame subjects effectively and evoke a specific mood.
The Significance of Lighting in Creative Photography
Lighting is arguably the most crucial element in photography. Natural light, particularly during the golden hour (sunrise and sunset), often produces soft, warm tones that enhance the mood of a photograph. Understanding how different light sources affect colors and shadows is fundamental to capturing evocative images. Learn to anticipate and manipulate lighting conditions to create striking visuals.
Creative Image Editing Techniques
Post-processing plays a vital role in enhancing creative photographs. Editing apps for the Galaxy S9 offer various tools for adjusting colors, contrast, and sharpness. Explore these options to fine-tune your images, adding a unique artistic touch. Utilize editing tools for color grading, saturation adjustments, and selective adjustments to achieve the desired aesthetic.
Examples of Creative Shots
“A dramatic black and white portrait of a subject against a vibrant sunset, using the S9’s HDR mode to capture the scene’s details; a close-up image of a flower, utilizing shallow depth of field and the S9’s manual focus for artistic blur.”
These are just two examples of creative shots that can be taken with the Galaxy S9 camera. The possibilities are truly endless, limited only by your imagination and willingness to experiment.
Last Point
In conclusion, this guide to Samsung Galaxy S9 camera tips and tricks equips you with the knowledge and techniques to capture exceptional photos and videos. We’ve covered everything from fundamental settings to advanced modes and creative photography approaches. Now, go forth and capture the world around you with confidence and creativity using your Samsung Galaxy S9’s powerful camera system.
From everyday snapshots to artistic masterpieces, the possibilities are endless!