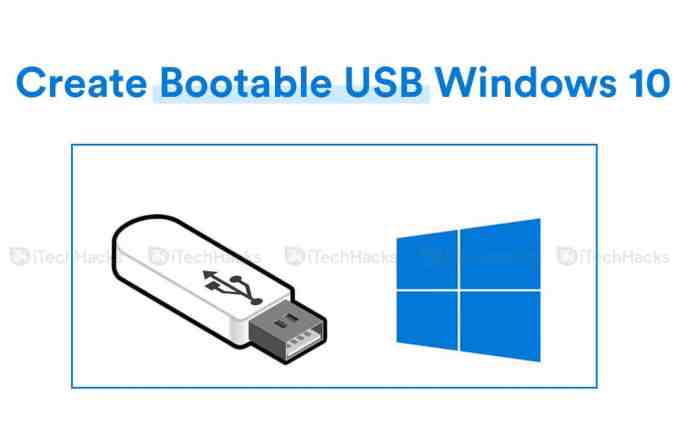
How to create a windows 10 bootable usb its easier than you think – How to create a Windows 10 bootable USB: it’s easier than you think. This guide walks you through the process, from prepping your USB drive to verifying your bootable USB. We’ll cover everything you need to know, including downloading the correct Windows 10 ISO, using reliable tools like Rufus, and troubleshooting common problems.
Creating a bootable USB drive for Windows 10 isn’t rocket science. With the right steps and a little patience, you can have a working installation media ready to go. This comprehensive guide ensures a smooth experience, making it possible to install or repair your Windows system with ease.
Introduction to Bootable USBs: How To Create A Windows 10 Bootable Usb Its Easier Than You Think
A bootable USB drive, often called a bootable USB, is a flash drive that can be used to start up a computer. It’s essentially a portable hard drive that contains an operating system or other software. This allows you to access and run software, even if your main hard drive or operating system is not working. Think of it as a portable version of a CD/DVD startup disk, but more flexible and convenient.Bootable USBs offer several advantages over traditional methods like CD/DVDs.
They are faster to load, more compact, and easier to manage. They are also reusable, allowing you to install different operating systems or software on different computers.
Purpose of a Bootable USB
Bootable USBs serve a variety of purposes. They are crucial for troubleshooting computer issues, installing operating systems like Windows 10, performing system repairs, running diagnostic tools, or even for backing up data. Their portability and flexibility make them an indispensable tool for both home users and IT professionals.
Creating a Bootable USB
Creating a bootable USB is a straightforward process, though the exact steps may vary slightly depending on the operating system. It involves downloading the necessary files, copying them to the USB drive, and configuring the BIOS to boot from the drive. This method offers a practical solution for a variety of computer tasks.
Types of Bootable USBs
Different types of bootable USBs can be created, each with a specific purpose. Common examples include:
- Windows 10 Installation Media: This type of bootable USB allows you to install or reinstall Windows 10 on a computer.
- Linux Distributions: Many Linux distributions can be installed onto a bootable USB drive to try the operating system without installing it on your hard drive.
- Antivirus Tools: Bootable USB drives can be created to run antivirus software on a computer without loading the operating system.
- Data Recovery Tools: Some data recovery software can be loaded onto a bootable USB to attempt recovering lost data on a damaged computer.
Steps to Create a Windows 10 Bootable USB
This section details the steps to create a bootable Windows 10 USB drive. The process is relatively simple, and the specific steps may vary slightly depending on the software you are using.
| Step | Description | Materials Needed |
|---|---|---|
| 1 | Download the Windows 10 ISO file from the Microsoft website. | Internet connection, computer with a web browser |
| 2 | Download and install a tool like Rufus or similar. | Computer, Internet connection, USB drive |
| 3 | Insert the USB drive into the computer. | USB drive |
| 4 | Open the bootable USB creation tool (like Rufus). | Bootable USB creation tool (e.g., Rufus), USB drive |
| 5 | Select the downloaded ISO file and the USB drive. | Downloaded Windows 10 ISO file, USB drive |
| 6 | Choose the appropriate options for the USB drive (e.g., GPT or MBR). | USB drive, knowledge of disk partitioning (optional) |
| 7 | Click “Start” to begin the creation process. | Bootable USB creation tool, USB drive, downloaded ISO file |
Preparing the USB Drive
Before you can create a bootable Windows 10 USB drive, you need to properly prepare the USB drive itself. This crucial step involves ensuring the drive is formatted correctly and, crucially, that any existing data is safely backed up. Skipping this step can lead to data loss, rendering the entire process useless.Preparing a USB drive for bootable media involves a few key steps.
The most important is safeguarding your existing data. A bootable USB drive often requires formatting the drive, which erases all data on it.
Backing Up Data
Backing up data on your USB drive is paramount. This step prevents accidental data loss during the formatting process. Employ reliable backup methods, such as copying files to another drive or using cloud storage services. Choose a method that suits your needs and ensures data integrity. Thoroughly verify the backup process to confirm the integrity of the backed-up data.
Formatting the USB Drive
Formatting the USB drive is necessary to prepare it for bootable media. This step erases all existing data on the drive. Always ensure that you have backed up all important data before formatting.
Formatting Options
Various formatting options are available for preparing a USB drive. The most common approach is to format the drive using the built-in Disk Management tool in Windows.
- Using Disk Management: This method allows for precise control over the formatting process. It’s a readily available tool within Windows. Disk Management offers options for different file systems.
- Using a Third-Party Tool: Some third-party tools provide additional formatting options and utilities. While convenient, it’s essential to ensure the tool’s reliability to avoid data loss. Verify the tool’s reputation and user reviews before proceeding.
File Systems for Bootable USB Drives
Different file systems have varying characteristics that affect bootable USB drives. The most common file system for Windows is NTFS, offering robust features for data organization and security. Other options exist, but NTFS is typically preferred.
- NTFS (New Technology File System): NTFS is a widely used file system in Windows. It supports large files, advanced security features, and efficient data management.
- FAT32 (File Allocation Table 32): FAT32 is an older file system compatible with various operating systems, but it has limitations on file size and is less secure compared to NTFS. In some cases, it may be necessary for compatibility with older systems.
Example: Formatting Steps
This table illustrates the steps for formatting a USB drive using Disk Management.
| Step | Description |
|---|---|
| 1 | Identify the USB drive in Disk Management. |
| 2 | Right-click the USB drive and select “Format”. |
| 3 | Choose the desired file system (e.g., NTFS). |
| 4 | Assign a drive letter (if needed). |
| 5 | Click “OK” to initiate the formatting process. |
Downloading the Windows 10 ISO
Finding a legitimate Windows 10 ISO file is crucial for creating a bootable USB drive. A genuine ISO ensures compatibility and avoids potential issues during the installation process. Downloading from untrusted sources can lead to malware or corrupted files, making the entire process unreliable and potentially damaging your system.The process of downloading a Windows 10 ISO is straightforward, but verifying the source is paramount.
This involves checking the website’s legitimacy and ensuring the file is compatible with your desired Windows 10 edition. Microsoft’s official website is the safest and most reliable source for these files.
Verifying the Source of the ISO File
Obtaining a Windows 10 ISO from a reputable source is vital to prevent malware or corrupted files. Microsoft’s official website is the safest and most reliable place to download these files. Always check the URL for accuracy and look for security seals or trust indicators. Downloading from unofficial or unknown websites is strongly discouraged, as it may expose your system to security risks.
Different Versions of Windows 10 and their ISOs
Windows 10 offers several editions, each with different features and capabilities. Understanding the distinctions between these editions is important to ensure you download the correct ISO for your needs. This includes factors like the number of processors supported, the available memory, and the software compatibility.
- Home: This is the most basic edition, suitable for personal use. It lacks advanced features found in other editions.
- Pro: Designed for businesses and power users, this edition provides advanced features like BitLocker encryption and remote desktop capabilities.
- Enterprise: This edition is tailored for large organizations and offers more extensive management tools and features, including advanced security and deployment options. These options are not accessible to regular consumers and require specific agreements and licenses.
- Education: This version is optimized for students and educators, providing access to various educational resources and tools. This version usually comes with discounted licenses or is available to students and institutions for specific periods.
Downloading the ISO File
Downloading the Windows 10 ISO from Microsoft’s website is a straightforward process. Follow these steps for a smooth download:
- Navigate to the Microsoft Software Download website.
- Locate the Windows 10 ISO download page.
- Select the appropriate edition and architecture (32-bit or 64-bit) for your system.
- Click on the download button.
- Save the ISO file to your desired location on your computer.
Windows 10 Versions and Corresponding ISOs
The table below summarizes the different Windows 10 versions and their associated ISOs. It highlights the key features and targets for each version.
| Version | Target Audience | Key Features | ISO File |
|---|---|---|---|
| Windows 10 Home | Home users | Basic features, suitable for personal use. | Windows10Home.iso (Example) |
| Windows 10 Pro | Businesses and power users | Advanced features like BitLocker encryption. | Windows10Pro.iso (Example) |
| Windows 10 Enterprise | Large organizations | Advanced management tools and security features. | Windows10Enterprise.iso (Example) |
| Windows 10 Education | Students and educators | Educational resources and tools. | Windows10Education.iso (Example) |
Creating the Bootable USB
Now that you’ve got your Windows 10 ISO file ready, it’s time to make that USB drive bootable. This step is crucial, as it transforms your USB into a portable version of the Windows installation. A dedicated tool like Rufus makes this process remarkably straightforward and efficient, avoiding potential errors.
Using Rufus to Create the Bootable USB
Rufus is a free, open-source utility designed specifically for creating bootable USB drives. It’s user-friendly and offers a clear interface, making it an excellent choice for both beginners and experienced users. This method guides you through the process of creating a bootable USB drive for Windows 10 installation.
Steps to Use Rufus
Creating a bootable USB drive with Rufus is a straightforward process. Following these steps ensures a smooth and accurate conversion of your USB drive into a Windows 10 bootable device.
Creating a Windows 10 bootable USB is surprisingly straightforward. While you’re at it, you might want to check out Woots’ huge sale, featuring 4K TVs, HDTV antennas, universal remotes, and more! This sale could be a great opportunity to upgrade your home entertainment setup. Once you’ve got that handled, you can get back to creating your bootable USB and enjoy a smoother tech experience.
- Launch Rufus: Open the Rufus application on your computer. The interface will display several options and fields for configuring the bootable USB creation process.
- Select the USB Drive: In the Rufus window, locate the “Device” field. Click on it and select the USB drive you intend to use for the bootable installation. The selected USB drive will appear in this field.
- Choose the ISO File: The next crucial step is to select the Windows 10 ISO file you downloaded earlier. Click on the “Select” button within the “Boot selection” field, and locate the ISO file on your computer. Select it and click “Open.” Ensure that the correct ISO file is selected to prevent errors during the process.
- Verify the Settings: Double-check the settings for the USB drive. Verify that the correct drive is selected and that the ISO file you want to use is identified. Pay attention to the “Partition scheme” and “Target system type” options. The default settings usually work well for most users, but be sure to review them and understand their purpose if necessary.
- Click “Start”: After ensuring all the settings are correct, click on the “Start” button. This initiates the process of writing the Windows 10 installation files to the USB drive. A progress bar will show you the current status of the operation.
- Complete the process: Once the progress bar reaches 100%, the bootable USB drive is ready. Ensure that the drive is properly ejected and you are ready to boot your computer from it for installation.
Selecting the Correct ISO File in Rufus
Accurately selecting the correct ISO file in Rufus is paramount to a successful bootable USB creation. This step ensures the proper Windows 10 installation files are written to the USB drive, avoiding errors and ensuring a smooth installation process.
| Step | Action | Expected Outcome |
|---|---|---|
| 1 | Locate the downloaded Windows 10 ISO file. | The ISO file will be identified by its .iso extension. |
| 2 | Click the “Select” button in the “Boot selection” field of Rufus. | A file selection window will appear. |
| 3 | Navigate to the location of the ISO file. | The correct path to the ISO file should be displayed. |
| 4 | Select the Windows 10 ISO file and click “Open.” | The selected ISO file will be displayed in the “Boot selection” field. |
Double-check the selected file to ensure it’s the correct Windows 10 ISO you downloaded. This meticulous step avoids any errors in the bootable USB creation process.
Verifying the Bootable USB
Creating a bootable USB drive is only half the battle. Just as important as the creation process is ensuring that the drive functions as intended. This section details crucial verification steps to confirm your bootable USB drive’s readiness for use. A correctly functioning bootable USB is vital for a successful operating system installation or repair.
Methods for Verifying Boot Functionality
Various methods exist to confirm the bootable USB drive’s functionality. Choosing the right method depends on your available resources and desired level of detail. Different methods target different aspects of the boot process.
Booting from the USB on a Different Computer
This is the most direct and comprehensive method to validate the bootable USB. The goal is to start the computer using the USB drive as the primary boot device.
- Powering on the Target Computer: Ensure the target computer is turned off and then restart it. The process varies based on the specific computer model, but typically involves pressing a specific key combination (e.g., F12, F10, Del) during the boot sequence to enter the boot menu.
- Selecting the Boot Device: Navigate the boot menu and choose the USB drive as the first boot device. The exact wording and arrangement of the menu will differ between computer manufacturers.
- Observing the Boot Process: Watch the computer’s screen during the boot process. A successful boot will display messages related to the operating system loading. Errors or a failure to boot indicate a problem with the USB drive or its configuration.
- Testing Different Windows Features (Optional): If the boot is successful, test basic Windows functions like opening the File Explorer or checking the drive. This provides further validation of the USB drive’s operability. Verify that files and programs can be accessed.
Troubleshooting Boot Issues
If the USB drive fails to boot, several potential issues could be present. Thorough analysis is essential to pinpoint the root cause.
- Incorrect Boot Order: Ensure the USB drive is set as the primary boot device in the BIOS settings. This is critical to the process. If the BIOS is not configured correctly, the system will not boot from the USB.
- Corrupted ISO Image: The Windows 10 ISO image itself might be corrupted. Redownloading the ISO file and repeating the creation process may resolve this issue.
- USB Drive Errors: Physical problems with the USB drive itself, like poor connection or hardware failure, can cause boot issues. Using a different USB port or a different USB drive can confirm this possibility.
- Driver Compatibility Issues: The USB drive might be incompatible with the target computer’s hardware. Checking the USB driver compatibility is essential to rule out any issues.
Alternative Verification Methods (Less Comprehensive)
These methods offer a quicker but less in-depth validation of the USB drive.
- Checking File System Integrity: Using a tool to verify the file system on the USB drive can check for structural errors. Tools like `chkdsk` in Windows can assist in this verification process. File system integrity is important for the proper functioning of the boot process.
Troubleshooting Common Issues
Creating a bootable Windows 10 USB drive can sometimes encounter hiccups. This section details common problems you might face during the process and provides solutions to get you back on track. Understanding these potential pitfalls and their remedies can save you valuable time and frustration.
USB Drive Issues
Incorrectly formatting or selecting the USB drive can lead to errors. Ensure you’ve chosen the correct USB drive and that it’s not already in use by another process. If the drive is encrypted or protected, you might need to disable these protections. Double-check the USB drive’s capacity. A drive too small for the Windows 10 ISO will cause errors.
Figuring out how to create a Windows 10 bootable USB is surprisingly straightforward. It’s easier than you might think, really. Learning about ancient civilizations, like the fascinating details in the the lost city of the monkey god interview honduras civilization , can be equally enlightening. Once you’ve mastered that, you’ll be ready to tackle any technical challenge, like creating that Windows 10 bootable USB, with confidence.
The ISO file itself should also be checked for integrity and proper download.
- Incorrect USB Drive Selection: Verify that you selected the correct USB drive in the software used for creating the bootable drive. Double-check the drive letter and size to avoid accidental selection of the wrong device.
- Drive Errors: If the drive is corrupted or has bad sectors, the creation process might fail. Use a disk check utility (e.g., chkdsk) to identify and repair any issues before attempting to create the bootable USB.
- Insufficient Space: The Windows 10 ISO file can be substantial. Ensure that the selected USB drive has enough free space to accommodate the ISO file and other necessary files for the bootable environment.
ISO File Issues
Corrupted or incomplete ISO files can lead to problems during the bootable USB creation.
Creating a Windows 10 bootable USB is surprisingly straightforward. It’s a great skill to have, especially if you’re looking to troubleshoot a computer or install Windows on a new drive. While you’re researching how-to guides, you might also want to check out the awesome deal on Samsung’s latest Chromebook for Cyber Monday; samsung is practically giving away its latest chromebook for cyber monday.
Knowing how to make a bootable USB will be handy if you decide to install Windows on a new device, or perhaps you want to use a Chromebook as your primary machine. The process is surprisingly simple, just follow the online tutorials.
- Corrupted ISO File: Verify the integrity of the downloaded ISO file. Use a checksum tool (e.g., MD5 or SHA-256) to compare the downloaded file against the expected checksum value. If the checksums don’t match, the ISO file is likely corrupted, and you need to download it again from a reliable source.
- Incomplete Download: Interruptions during the ISO download can lead to incomplete files. Ensure the download is complete and uninterrupted to prevent errors during the creation process.
Software Issues
Software used for creating the bootable USB may have compatibility issues or bugs.
- Software Compatibility: The software you are using to create the bootable drive may not be compatible with your operating system or hardware configuration. Ensure the software is up-to-date and compatible with your system’s specifications.
- Software Errors: Check for error messages displayed by the software during the process. These messages often contain clues to identify and address the root cause of the problem. Consult the software’s documentation or online support resources for troubleshooting guides.
Troubleshooting Table, How to create a windows 10 bootable usb its easier than you think
| Issue | Cause | Solution |
|---|---|---|
| Bootable USB creation fails | Corrupted ISO file, insufficient USB space, incorrect USB drive selection | Download a fresh ISO file, ensure sufficient space on the USB drive, double-check the drive selection, run disk check utility |
| Software crashes during process | Incompatible software version, software bug, or conflicting processes | Update the software, restart your computer, close other running applications, check system compatibility |
| USB drive not recognized | Incorrect USB drive selection, USB drive hardware failure | Verify USB drive connection, try a different USB port, check the drive for hardware issues |
Step-by-Step Troubleshooting
- Verify the ISO file: Use a checksum tool to verify the integrity of the downloaded ISO file.
- Check USB drive: Ensure that the USB drive is correctly selected and has enough free space. Check for errors with disk check utility.
- Restart the computer: Sometimes a simple restart can resolve temporary glitches.
- Update software: Ensure the software used for creating the bootable USB is up-to-date and compatible with your system.
- Check for errors: Pay close attention to any error messages displayed during the process.
- Seek help: If the problem persists, consult the software’s documentation or online support forums for further assistance.
Alternative Methods
Creating a bootable Windows 10 USB drive isn’t limited to the method Artikeld previously. Several alternative approaches exist, each with its own set of advantages and disadvantages. Understanding these alternatives can help you choose the best method for your specific needs and circumstances.While the primary method, using a dedicated tool like Rufus, offers a straightforward and generally reliable process, other options might be preferable in certain situations.
These alternatives may leverage different software or command-line interfaces, providing varying degrees of control and flexibility.
Third-Party Boot Creation Tools
Several third-party tools offer alternative methods for creating bootable USB drives. These tools often come with additional features, such as the ability to create bootable drives for different operating systems or to perform other disk management tasks. However, these tools can also introduce complexities and potential compatibility issues.
- Ease of use can vary significantly between tools. Some have intuitive graphical interfaces, while others rely on command-line options, which might require more technical expertise.
- Speed of creation can also differ. Some tools may be optimized for faster writing speeds, while others might be slower due to their design or implementation.
- Resource requirements, such as system RAM and processor speed, can vary depending on the complexity of the tool and the size of the ISO image being written.
Using the Command Prompt
Advanced users may opt for using the command prompt for creating a bootable USB. This method provides maximum control and flexibility but requires a solid understanding of command-line syntax and potential errors.
- This approach typically involves using commands like `diskpart` and `bootsect` to format the drive and prepare the boot sector. Detailed knowledge of these commands is essential for successful execution.
- The command-line method offers the most granular level of control over the process. This level of control is invaluable for complex situations but also introduces the potential for mistakes if not carefully executed.
- Speed of creation can vary, depending on the speed of the USB drive and the processing power of the system.
Comparison Table
| Method | Ease of Use | Speed | Resources Required |
|---|---|---|---|
| Rufus (Primary Method) | High | Generally Fast | Low |
| Third-Party Tools | Variable | Variable | Variable |
| Command Prompt | Low | Variable | Medium to High |
This table summarizes the key differences between the various methods for creating a bootable USB drive. Consider your technical skills and the specific needs of your task when choosing the most suitable method.
Additional Tips and Considerations
Creating a bootable Windows 10 USB drive is a straightforward process, but a few extra precautions and considerations can make the experience even smoother and safer. Understanding the potential pitfalls and employing best practices can save you from frustration and data loss. This section will delve into essential tips, safety measures, maintenance strategies, and common mistakes to avoid.Beyond the basic steps, there are subtle nuances that can significantly impact the success and longevity of your bootable USB.
Careful planning and execution are key to ensuring your bootable USB functions reliably when you need it.
Safety Precautions and Best Practices
Thorough preparation is crucial to avoid accidental data loss or corruption. Before embarking on the bootable USB creation process, ensure you have a backup of any important data on the drive you intend to use. This is a fundamental safety precaution. The creation process can potentially overwrite the contents of the USB drive. Always double-check the target drive to ensure you’re not inadvertently erasing crucial files.
Maintaining Your Bootable USB
Proper storage and handling are vital for preserving the integrity of your bootable USB. Avoid extreme temperatures, humidity, and physical shocks, as these can damage the drive and render it unusable. Ideally, store the bootable USB in a cool, dry place away from direct sunlight or heat sources.
Common Mistakes and How to Avoid Them
Misunderstandings and errors in the process can lead to problems. A common mistake is using the wrong ISO file, leading to a non-functional bootable USB. Always double-check that the ISO file matches the intended Windows version. Another frequent error involves using the wrong USB drive, potentially erasing important data on the wrong drive. Before initiating the creation process, carefully identify the target USB drive and ensure it’s the correct one.
Additional Tips and Tricks
Implementing these additional tips can enhance the effectiveness and reliability of your bootable USB:
- Verify the ISO Integrity: Before proceeding with the creation process, use a checksum tool (like MD5 or SHA-1) to verify the integrity of the downloaded ISO file. This ensures the file hasn’t been corrupted during download. This step prevents creating a bootable USB from a compromised ISO.
- Format the Drive Correctly: Using the correct formatting for the USB drive is essential. Employing the correct file system, like FAT32, ensures compatibility and avoids potential issues during the boot process. Using a FAT32 file system is recommended to avoid compatibility problems during the boot process.
- Choose the Right USB Drive: Ensure the USB drive is compatible with the process and has sufficient free space. A smaller USB drive with limited space might not be able to accommodate the Windows 10 installation files.
- Use a Reputable Tool: Selecting a reliable tool for creating the bootable USB is crucial. Employing a well-regarded and tested tool minimizes the risk of errors and ensures a successful creation.
Recommended Practices Table
| Tip | Description | Potential Benefits |
|---|---|---|
| Verify ISO integrity | Use checksum tools to validate the downloaded ISO file. | Ensures the file hasn’t been corrupted, preventing a faulty bootable USB. |
| Format drive correctly | Use the correct file system (e.g., FAT32). | Ensures compatibility with the boot process and avoids potential issues. |
| Choose the right USB drive | Ensure the drive is compatible and has sufficient free space. | Reduces the risk of errors due to insufficient space or incompatible drives. |
| Use a reputable tool | Employ a well-regarded and tested tool. | Minimizes the risk of errors and ensures a successful creation. |
Summary
We’ve explored how to create a Windows 10 bootable USB, a useful tool for various computer tasks. From downloading the correct ISO to verifying the bootable USB, we covered all the essential steps. Remember to back up your data and choose the right tool for the job. If you encounter any problems, the troubleshooting section will guide you through common issues.
Now you’re ready to create your own bootable USB for Windows 10!

