

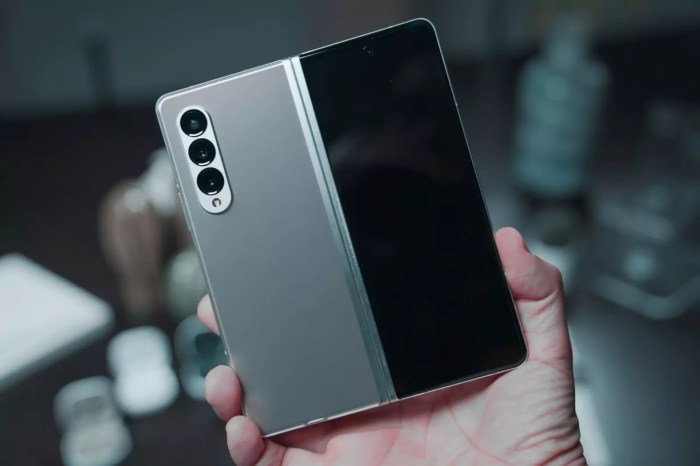
Can you remove the built in screen protector on the galaxy z flip 4 or z fold 4 – Can you remove the built-in screen protector on the Galaxy Z Flip 4 or Z Fold 4? This is a crucial question for anyone considering a DIY screen protector swap or simply curious about the possibility. We’ll dive deep into safety precautions, different screen protector types, removal methods, potential issues, and essential post-removal care, ensuring a smooth process and a protected screen.
We’ll also explore potential risks and how to mitigate them, providing a comprehensive guide for those brave enough to tackle this task.
Navigating the intricacies of removing a built-in screen protector can be tricky, especially on a foldable phone. This guide will equip you with the knowledge to understand the process and handle it with care. From tempered glass to plastic protectors, we’ll examine the differences in removal strategies, highlighting the potential for damage and how to avoid it. With detailed methods, helpful tools, and potential issue troubleshooting, we’ll help you confidently remove the protector without compromising the integrity of your device.
Different Screen Protector Types
Screen protectors are a crucial accessory for protecting your foldable phone’s delicate screen. Choosing the right type is paramount to maintaining the screen’s pristine condition and ensuring a smooth user experience. This exploration delves into the various screen protector materials, their removal challenges, and the potential for damage during the process.Different screen protector materials and adhesive properties significantly impact the ease and safety of removal.
Figuring out if you can remove the built-in screen protector on your Galaxy Z Flip 4 or Z Fold 4? While the specifics are often tricky to find, it’s definitely a worthwhile question to research. Meanwhile, the GoPro Hero 10 Black announcement, with its GP2 high frame rate auto upload feature, which is really exciting for action-cam enthusiasts , has me thinking about how important screen protectors are, especially on foldable phones.
Ultimately, the answer to removing the Galaxy Z Flip 4 or Z Fold 4’s built-in protector often depends on individual phone models and the specific manufacturer’s instructions.
Understanding these factors is essential for preventing screen damage and ensuring a hassle-free experience.
Tempered Glass Screen Protectors
Tempered glass protectors are known for their strength and durability, offering excellent scratch resistance. However, their robust nature also translates into a more challenging removal process. The strong adhesive, designed to hold the glass securely, can create significant resistance during removal. Improper techniques can potentially leave residue or even cause microscopic scratches on the screen.
Plastic Screen Protectors
Plastic screen protectors are generally more affordable and easier to remove compared to tempered glass. Their flexibility often allows for a more straightforward removal process. However, their scratch resistance is often lower than tempered glass, making them less suitable for high-impact environments. The adhesive on plastic protectors, while less potent than tempered glass, can still leave residue if not removed carefully.
Wondering if you can remove the pre-installed screen protector on your Galaxy Z Flip 4 or Z Fold 4? While some might say it’s best left untouched, checking out the latest tech news like the Xiaomi 11i Hypercharge 5G India launch at xiaomi 11i hypercharge 5g india launch might give you some inspiration for other potential modifications.
Ultimately, whether or not to remove it is a personal choice, depending on your usage habits and desired level of protection.
Adhesive Properties and Removal Difficulty
The adhesive used in screen protectors is a key factor influencing the removal process. Stronger adhesives, like those found in tempered glass protectors, provide superior scratch resistance but make removal more complex. Conversely, weaker adhesives in plastic protectors are easier to remove but might not offer the same level of protection.
Comparison of Screen Protector Types
| Screen Protector Type | Material | Adhesion | Removal Challenges |
|---|---|---|---|
| Tempered Glass | Glass | High | Potential for residue, screen scratching if not removed carefully |
| Plastic | Plastic | Medium | Potentially easier to remove but may not offer the same level of protection as tempered glass |
The table above summarizes the key differences between tempered glass and plastic screen protectors. Consider the balance between protection and ease of removal when making your decision. Remember, aggressive removal methods can potentially damage your phone’s screen, so proceed with caution.
Removal Methods and Tools
Removing a screen protector from a delicate device like a Galaxy Z Flip 4 or Z Fold 4 requires careful consideration to avoid damaging the phone’s screen. Improper methods can lead to scratches, bubbles, or even permanent damage to the sensitive foldable display. Understanding the various removal methods and utilizing the appropriate tools is crucial for a successful and safe process.Careful consideration of the materials used in the screen protector is important.
So, you’re wondering if you can remove the built-in screen protector on your Galaxy Z Flip 4 or Z Fold 4? It’s a tricky question, and honestly, it depends. While some users report success, others have had issues. Before you start prying, remember to check online reviews or tutorials; after all, you definitely want to avoid damaging your phone’s delicate screen! Speaking of tech, don’t forget to buy an HDMI cable for your Nvidia Shield Android TV! dont forget buy hdmi cable your nvidia shield android tv It’s a crucial accessory for a smooth streaming experience.
Regardless, thorough research is key to avoiding any screen damage when considering removing that built-in protector.
Some are designed to be easily removed, while others may require a more precise approach. The best method will depend on the specific type of screen protector applied.
Different Removal Methods
Several methods can be used to remove screen protectors from foldable phones. Choosing the right method is essential to avoid scratching the screen. Methods range from simple techniques to more advanced methods using specialized tools.
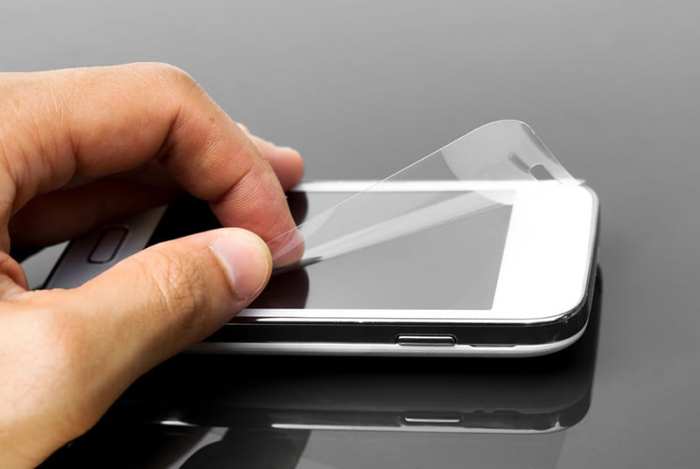
- The Gentle Peel: For some screen protectors, a simple, gentle peel might suffice. Carefully lift one edge of the protector with a soft, non-abrasive tool, like a plastic card or a fingernail (if you are certain the material will not scratch). Slowly work your way around the perimeter, being mindful of not applying too much pressure. This approach is ideal for easily removable screen protectors.
- The Adhesive Remover: If the screen protector is more firmly adhered, using a specialized adhesive remover is advisable. Apply a small amount of the remover to a soft cloth or cotton swab, and gently wipe along the edges of the protector. Avoid prolonged contact or excessive pressure to prevent damage to the screen. Always follow the manufacturer’s instructions for the adhesive remover.
- The Plastic Card Scraper: A plastic card scraper, or a similar tool with a smooth edge, can be used to gently lift the screen protector. Carefully slide the edge of the card under the protector’s edge, creating a small gap. Work your way around the perimeter, using slow, controlled motions. Using a plastic card scraper helps prevent scratches.
- The Specialized Removal Kits: Some screen protector removal kits include specific tools designed to lift and remove screen protectors without damaging the device. These kits often include specialized plastic tools and adhesive removers. Carefully follow the kit’s instructions to ensure the process is carried out safely and effectively.
Specialized Tools for Safe Removal
Choosing the right tool is essential for the safe removal of screen protectors. The wrong tool can easily damage the phone’s screen.
- Plastic Card Scrapers: These tools are commonly available and are useful for gently lifting the edges of the protector. Choose a card with a smooth, non-abrasive surface to prevent scratching the phone’s screen.
- Specialized Screen Protector Removal Kits: These kits often include a variety of tools, such as suction cups, plastic scrapers, and adhesive removers. These kits are specifically designed for safe removal of screen protectors, often containing soft materials to protect the phone’s screen.
- Cotton Swabs and Soft Cloths: For using adhesive removers, use soft cloths or cotton swabs to apply the remover to the protector’s edges. These materials help prevent scratching the screen.
Example Removal Methods Table
The table below Artikels different removal methods, the necessary tools, and the steps involved.
| Method | Tools Needed | Steps |
|---|---|---|
| Gentle Peel | Soft cloth or plastic card | 1. Carefully lift one edge of the protector. 2. Slowly work your way around the perimeter. |
| Adhesive Remover | Adhesive remover, soft cloth or cotton swab | 1. Apply a small amount of remover to a cloth or swab. 2. Gently wipe along the protector’s edges. |
| Plastic Card Scraper | Plastic card scraper | 1. Carefully slide the card under the protector’s edge. 2. Work your way around the perimeter, using slow, controlled motions. |
| Specialized Removal Kits | Specific tools in the kit | Follow the kit’s instructions precisely. |
Potential Issues and Troubleshooting
Removing screen protectors, while generally straightforward, can sometimes lead to unexpected challenges. Understanding potential problems and their solutions is crucial for a smooth and successful removal process, preventing damage to your expensive foldable phone. This section details common issues and effective troubleshooting strategies.
Adhesive Residue
A common aftermath of screen protector removal is adhesive residue left on the screen. This residue can be stubborn and challenging to eliminate. Several factors contribute to this issue, including the type of adhesive used in the protector, the duration of its contact with the screen, and the technique used for removal. Careful handling and the correct approach are essential to minimize this problem.
- Problem: Sticky residue remains on the screen after removal.
- Cause: The adhesive from the screen protector has not fully released from the phone’s surface.
- Solution: Use a specialized screen protector residue remover, a soft microfiber cloth, or a solution of isopropyl alcohol (70% or higher) applied to the cloth. Apply gentle pressure and circular motions to loosen the residue, avoiding harsh scrubbing that could damage the screen.
Difficulty Detaching the Protector, Can you remove the built in screen protector on the galaxy z flip 4 or z fold 4
Sometimes, the screen protector might be challenging to detach completely. This could be due to the protector’s strong adhesive or improper removal techniques. Using the correct tools and methods significantly reduces this issue.
- Problem: The screen protector is difficult to detach without tearing.
- Cause: Improper application of heat, or excessive pressure when detaching the protector.
- Solution: Avoid applying excessive heat, and use a gentle, steady, and consistent pulling motion. Apply heat only if necessary, but not enough to damage the phone screen. Use a plastic card or a specialized tool, gently working under the edges of the protector to separate it from the phone.
Stubborn Adhesive
Dealing with stubborn adhesive residue requires patience and the right tools. There are several strategies to tackle this persistent problem.
| Problem | Cause | Solution |
|---|---|---|
| Stubborn adhesive residue | The adhesive has bonded strongly to the screen’s surface. | Use a specialized screen protector residue remover, or a 70% isopropyl alcohol solution on a microfiber cloth. Work in small sections, gently lifting and removing any residue. If the residue is particularly stubborn, consider a second application of the remover, following manufacturer’s instructions. |
| Damage to the screen | Using abrasive materials or harsh chemicals. | Avoid using harsh chemicals or abrasive materials. Focus on applying gentle pressure and circular motions to remove the residue. |
Troubleshooting Techniques
Troubleshooting adhesive residue and detachment issues involves a systematic approach. Start with the simplest solutions and gradually move to more advanced techniques if needed. A crucial element is to avoid damaging the screen.
- Step 1: Assess the extent of the residue or detachment issue.
- Step 2: Apply a residue remover or a solution of isopropyl alcohol (70% or higher) on a microfiber cloth.
- Step 3: Apply gentle pressure, and use circular motions to loosen the residue.
- Step 4: If the residue remains, consider using a specialized tool or a second application of the remover, carefully following the manufacturer’s instructions.

Post-Removal Care: Can You Remove The Built In Screen Protector On The Galaxy Z Flip 4 Or Z Fold 4
Now that your Galaxy Z Flip 4 or Z Fold 4 screen protector is history, the real work begins. Proper post-removal care is crucial for maintaining the pristine condition of your phone’s screen and ensuring a smooth transition to a new protector, if you choose to add one. This section will guide you through essential steps to ensure your phone’s screen remains clean and protected.
Importance of Cleaning the Screen
A clean screen is a protected screen. Removing a screen protector often leaves behind residue, dust particles, and microscopic debris that can scratch or damage the phone’s sensitive display. Thorough cleaning removes these contaminants, ensuring a flawless surface for any new protector you might apply. Proper cleaning prevents future issues and preserves the longevity of your device.
Proper Screen Cleaning Techniques
Cleaning your phone’s screen after protector removal requires gentle yet effective methods. Avoid harsh chemicals or abrasive materials that could scratch the glass. The best approach is a microfiber cloth and a specialized screen cleaner.
- Microfiber Cloths: These cloths are ideal because they are soft and lint-free. They effectively absorb dirt and residue without scratching the screen. Avoid using regular cotton cloths or paper towels, as they can leave behind fibers or particles.
- Screen Cleaners: Dedicated screen cleaners are formulated to gently remove smudges and fingerprints without damaging the display. Isopropyl alcohol (70% concentration) diluted with distilled water can also be used as a cleaning solution, but use extreme caution and test in a small, inconspicuous area first to avoid any potential damage.
- Cleaning Process: Begin by spraying a small amount of screen cleaner onto the microfiber cloth. Gently wipe the screen in circular motions, starting from the center and working outwards. Avoid applying too much pressure, especially near the edges of the screen. Repeat the process until the screen is completely free of residue and dust. Always ensure the cloth is clean and not abrasive before each wiping motion.
For stubborn marks, use a slightly dampened cloth, but avoid excessive moisture.
Applying a New Screen Protector (Optional)
If you decide to apply a new screen protector, proper application techniques are vital for optimal protection and longevity. Incorrect application can lead to air bubbles, dust particles trapped beneath the protector, and reduced clarity.
- Preparation: Ensure the screen is completely clean and free of dust, fingerprints, and residue. Use a microfiber cloth and screen cleaner as described above. A static-free cleaning cloth can also help minimize dust and debris.
- Application: Carefully align the screen protector with the phone’s screen, ensuring it’s positioned correctly. Follow the manufacturer’s instructions for the specific type of protector you’ve chosen. Some protectors use a special adhesive or application fluid; carefully follow these instructions. If possible, avoid touching the adhesive surface of the protector directly to prevent smudges or fingerprints.
- Bubble Removal: If bubbles form under the protector, use a microfiber cloth or a special tool to gently push them out. Avoid using sharp objects or excessive force, as this could damage the protector or the screen. Using a credit card or a similar plastic card works well for removing air bubbles. Gently slide the card along the edge of the bubble, pushing it towards the edge of the protector.
- Finishing Touches: Once the protector is fully applied, check for any remaining imperfections. Press firmly on the edges of the protector to ensure it adheres completely. If there are any remaining issues, carefully remove the protector and start again with a clean screen.
Step-by-Step Post-Removal Care Guide
- Step 1: Gather your cleaning supplies. This includes a microfiber cloth, a screen cleaner, and a static-free cleaning cloth if available. Ensure the cloth is clean and free of debris before beginning.
- Step 2: Gently wipe the phone screen with the microfiber cloth to remove loose debris. Start in the center and move outwards in circular motions. Apply a small amount of screen cleaner to the cloth. If needed, use a static-free cloth to remove any remaining dust.
- Step 3: Carefully wipe the entire screen using the cleaned microfiber cloth. Continue to wipe in circular motions, ensuring you are not applying excessive pressure. Focus on any remaining residue or dust particles.
- Step 4: Inspect the screen for any imperfections. If you notice any remaining smudges or dust, repeat the cleaning process.
- Step 5: If applying a new screen protector, carefully follow the manufacturer’s instructions to ensure proper application. Use the tools suggested by the manufacturer. Ensure you are following the instructions on the protector package carefully.
Closure
In conclusion, removing the built-in screen protector on your Galaxy Z Flip 4 or Z Fold 4 is possible, but requires careful consideration of safety and proper procedures. By understanding the potential risks, employing the right methods, and addressing potential issues, you can successfully navigate the removal process. Remember to prioritize safety and take your time. Thorough preparation and a cautious approach will lead to a satisfying outcome and a protected screen.
If you’re unsure, seeking professional help is always a wise option.